Quick Start Guide

Get your TraceableLIVE® device up and running quickly with these five easy steps:
- Registering A New TraceableLIVE® Account
- Creating Additional User Accounts
- Connect Your Device To the Internet
- Add The Device To Your Account
- Adding Users To The Device And Setting Notification Preferences
1) Registering A New TraceableLIVE® Account
If you don't have a TraceableLIVE® account already, you'll need to create one before you setup your new TraceableLIVE® device.
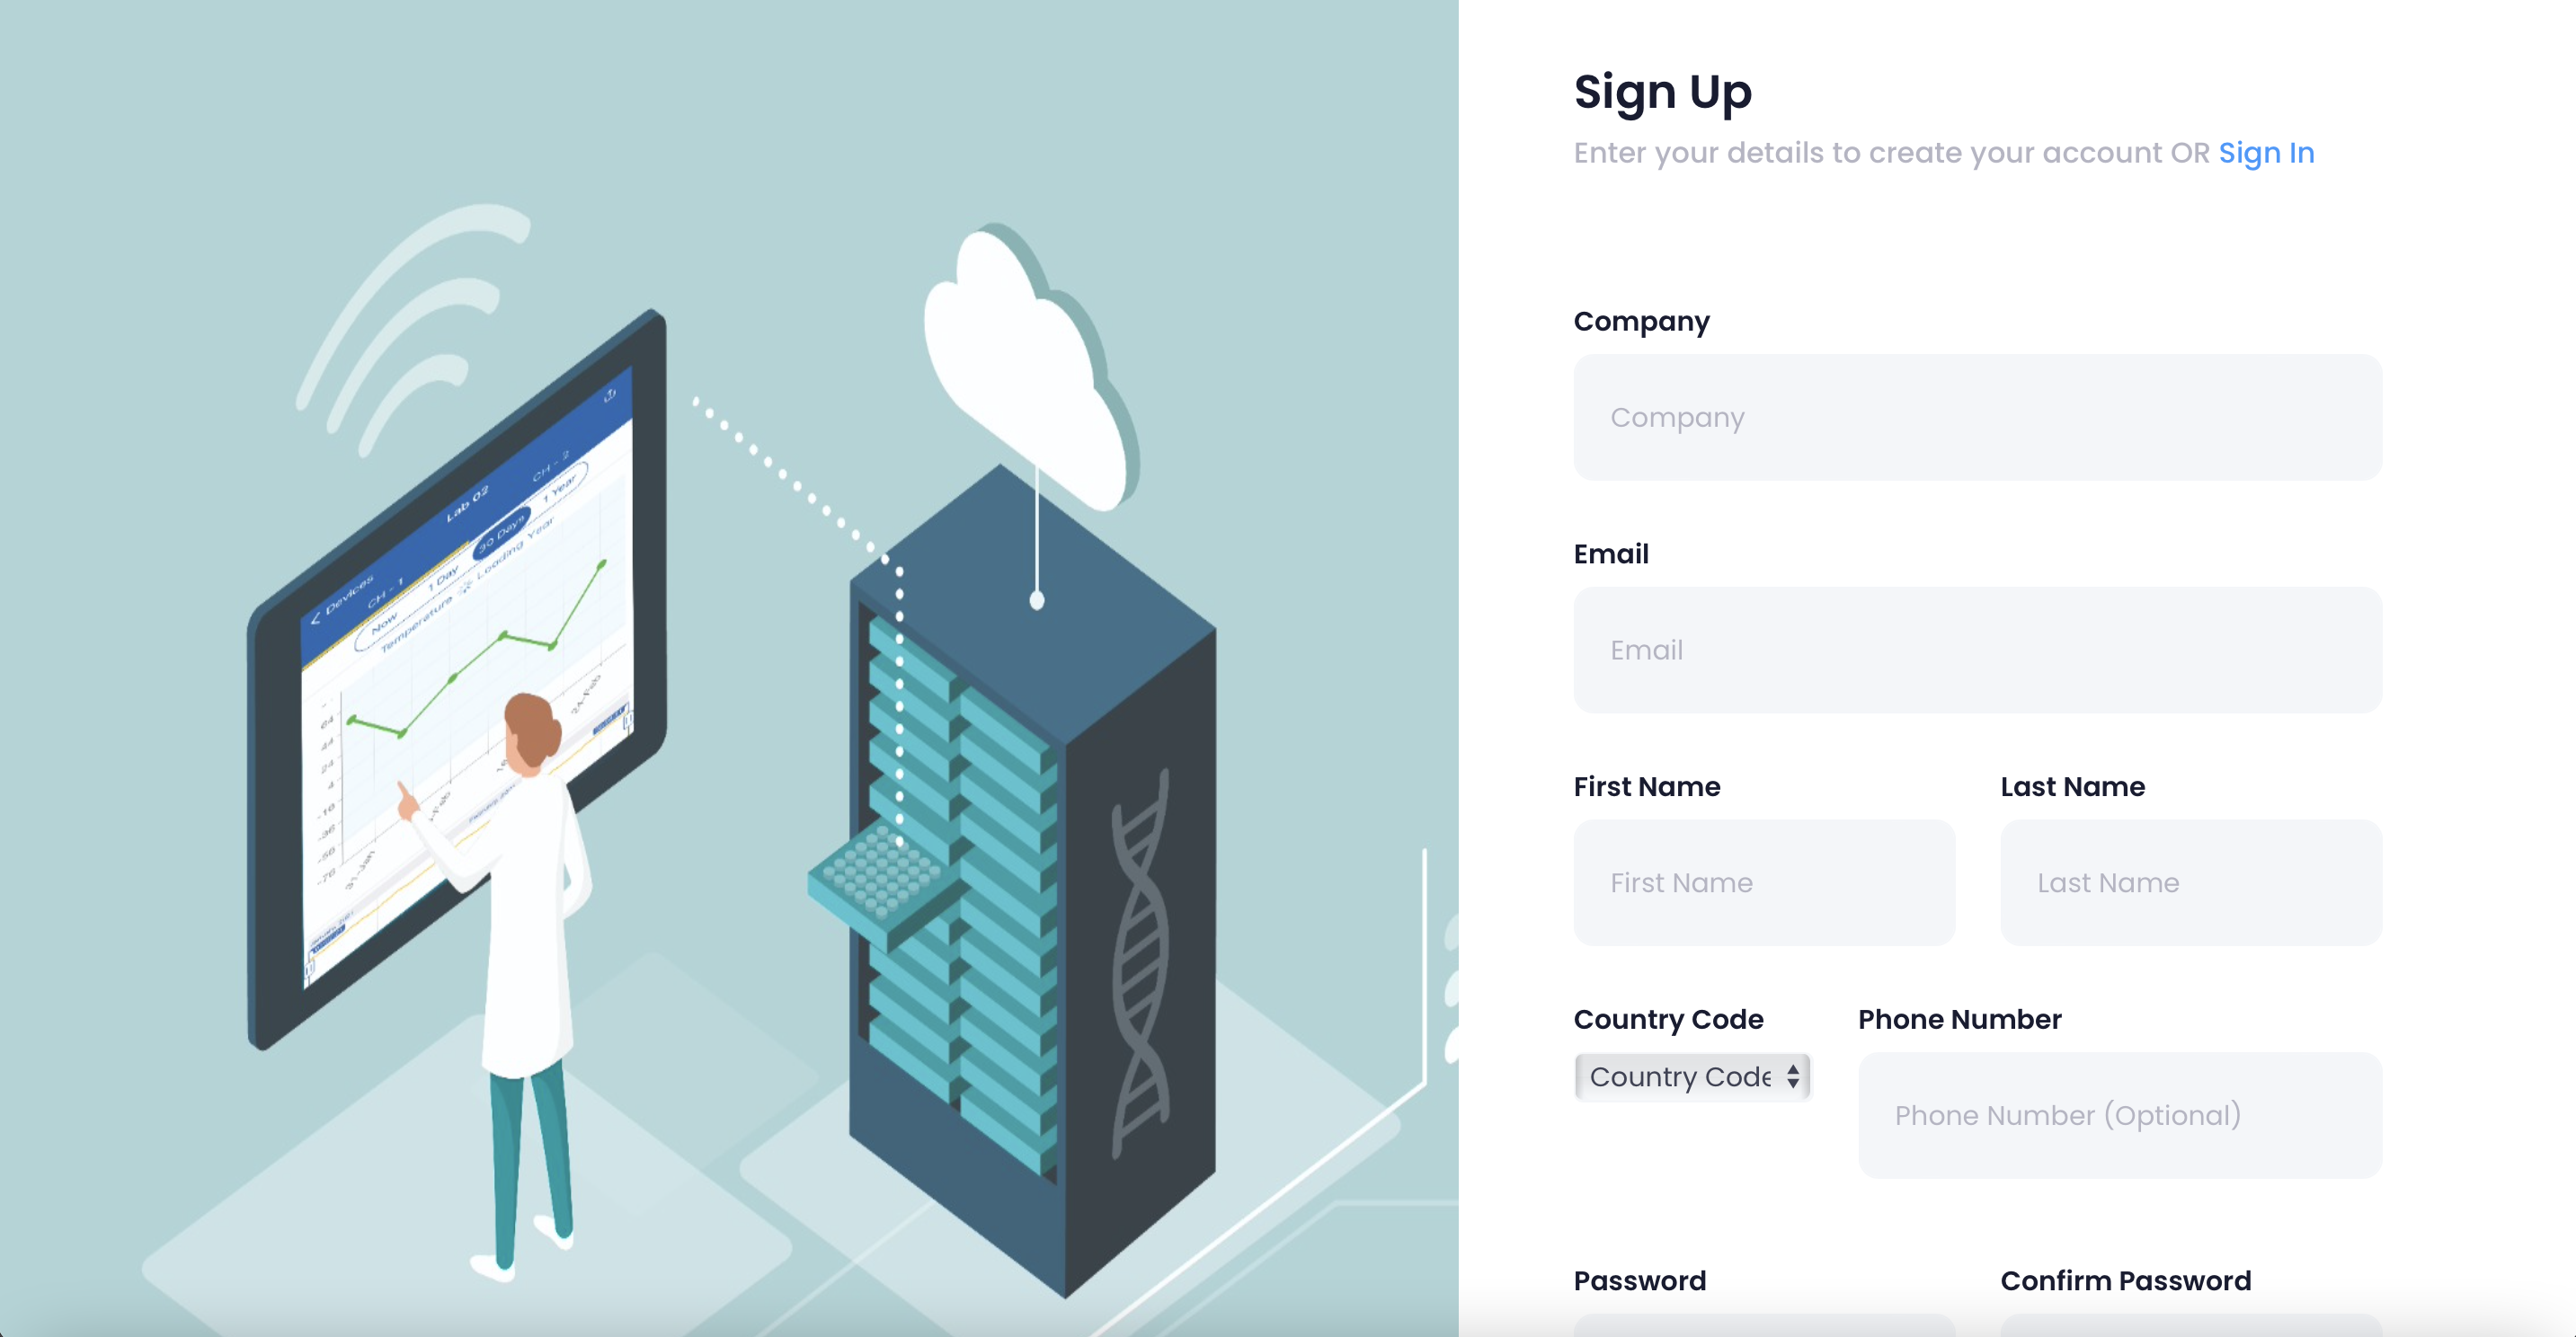
You can setup your account through the TraceableLIVE® website. For complete instruction, please see our Registering An Account guide.
2) Creating Additional User Accounts
Based on your subscription level, or if you are setting up a device via a prepaid account code, you need to add any additional user accounts that you will require.
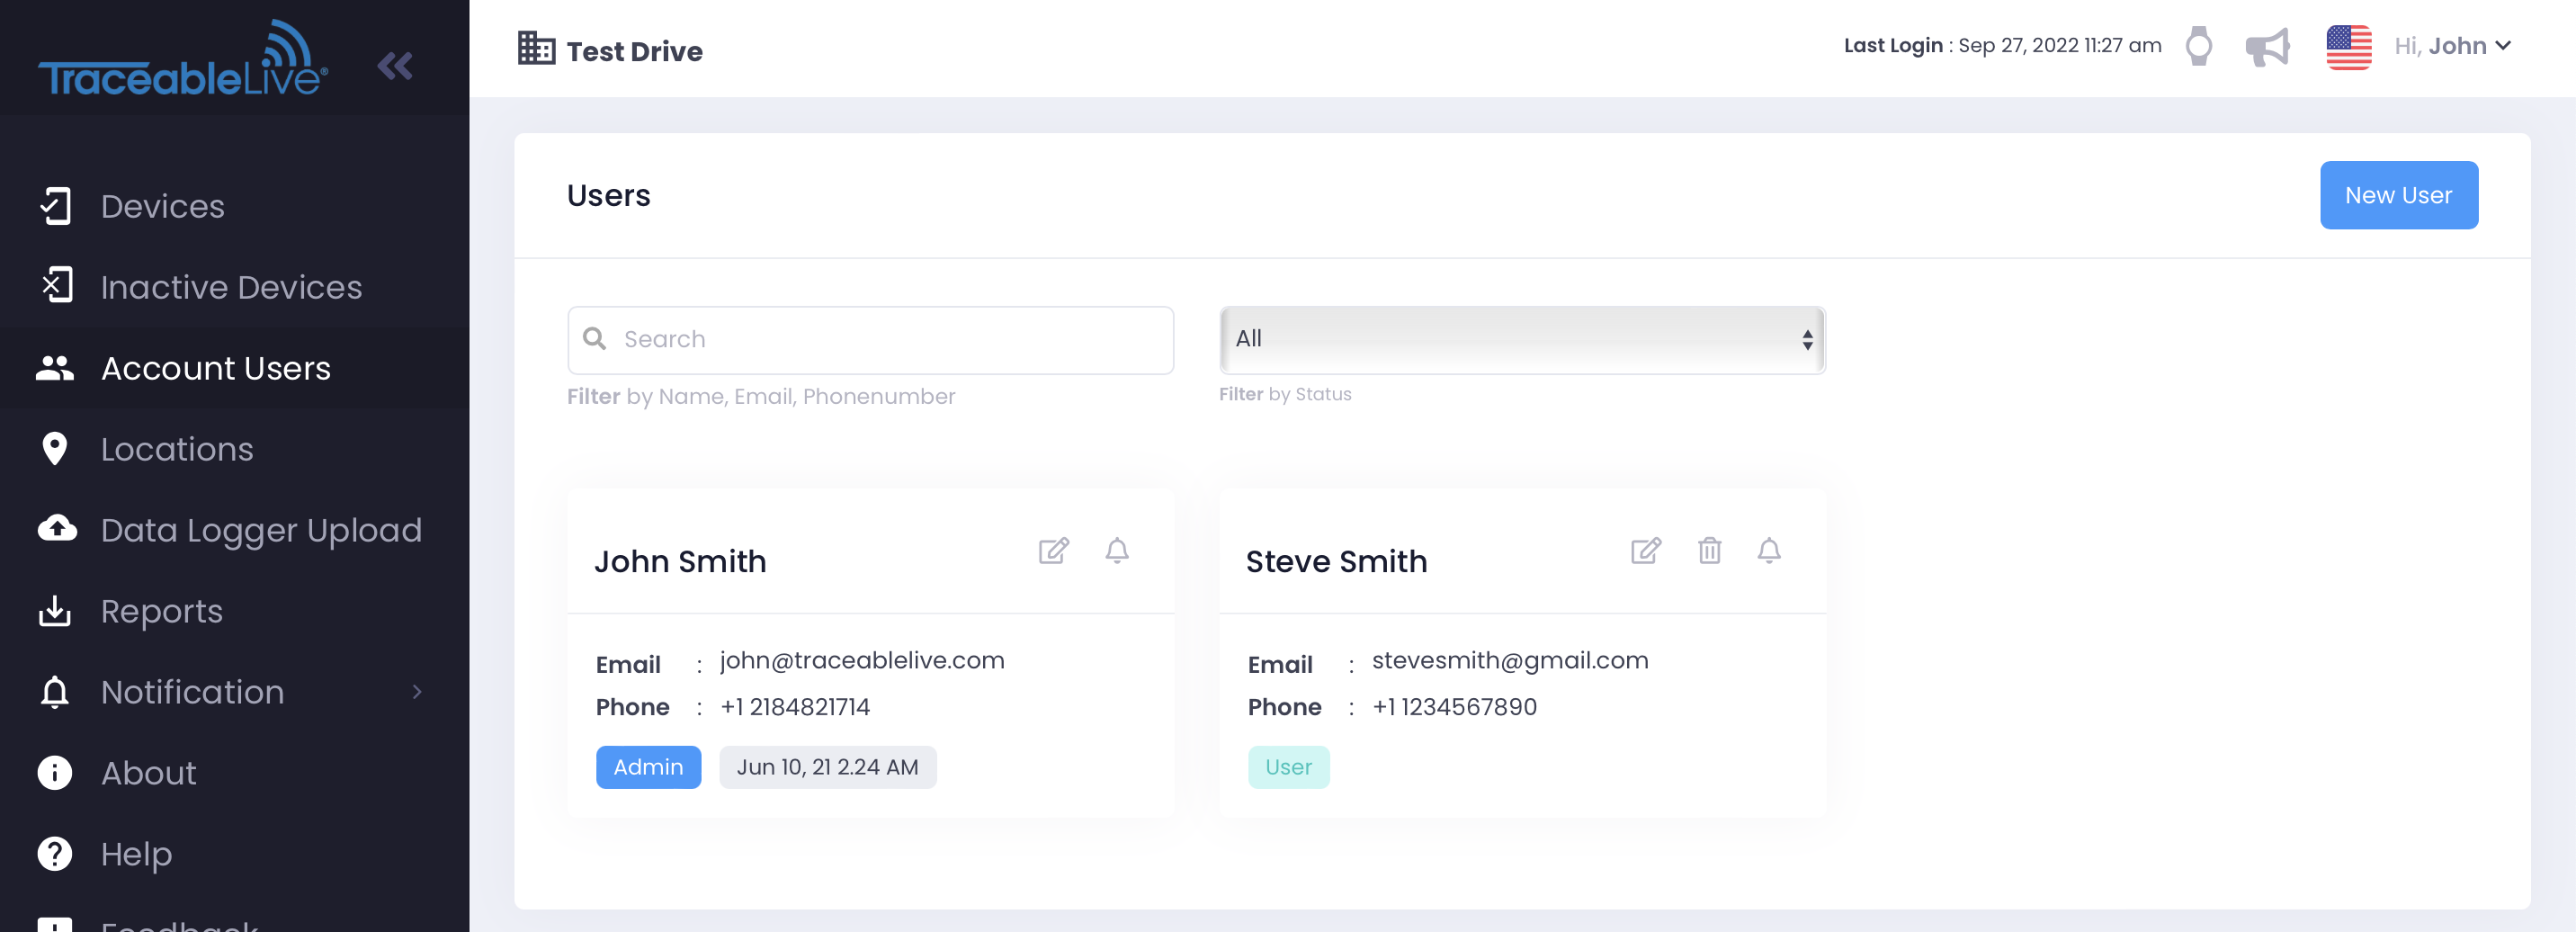
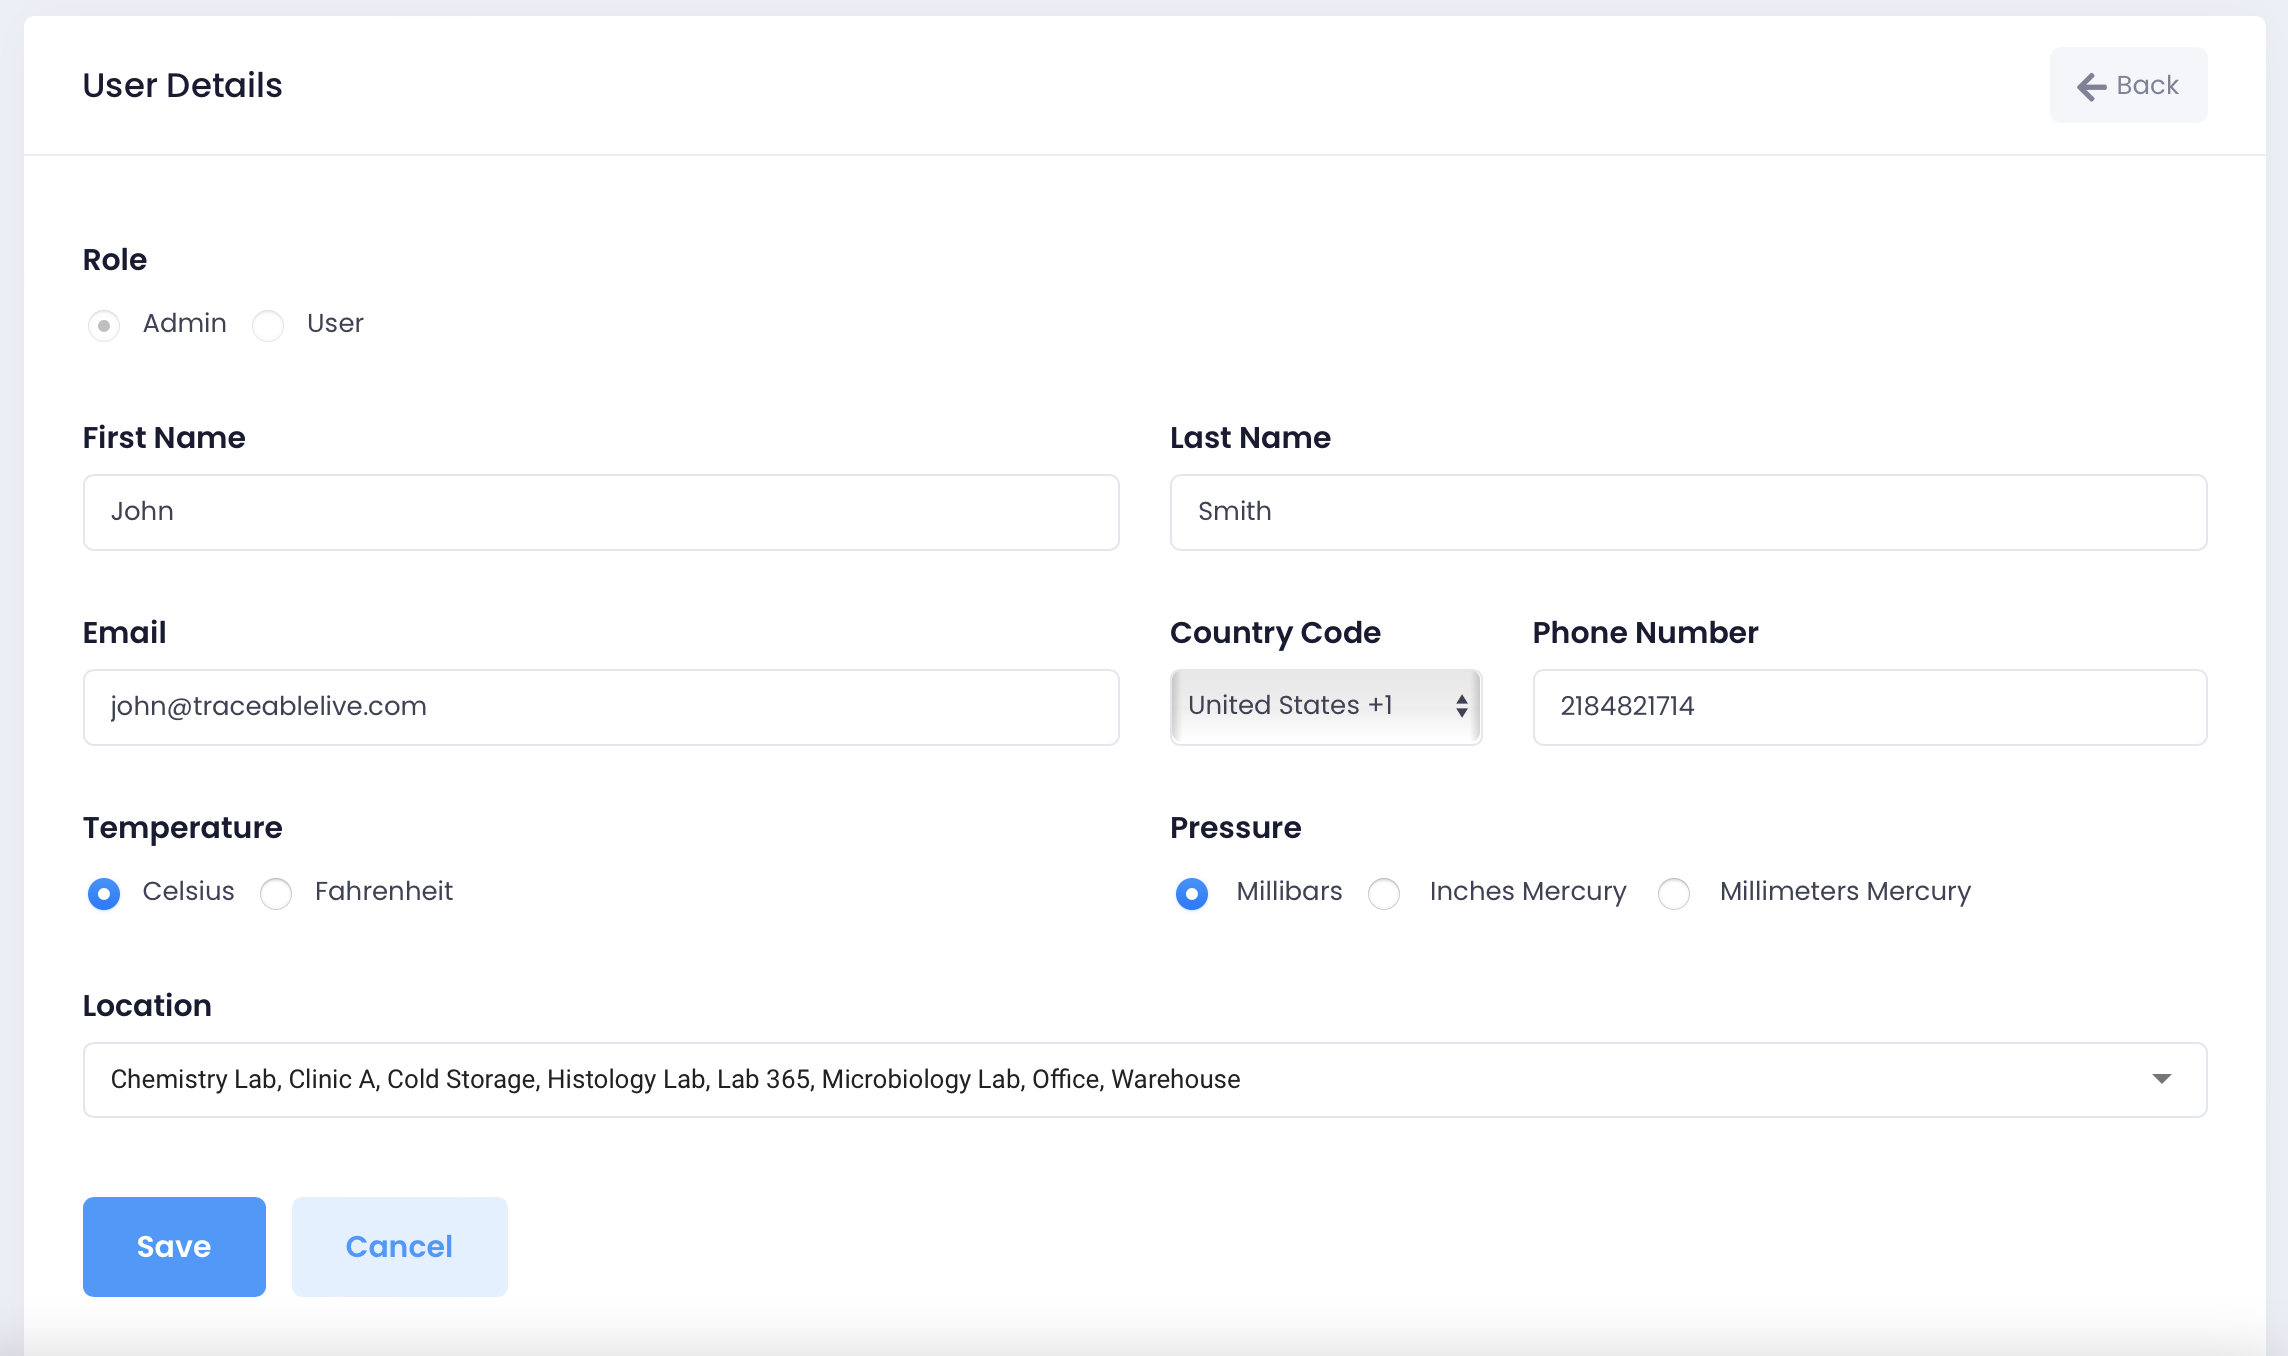
These will be other users who can log into the TraceableLIVE® app (web or mobile) or who you want to get notifications in the event of an excursion on the device.
Please see our Account Users guide for details.
3) Connect Your Device To the Internet
Based on the type of TraceableLIVE® device you have and your internet connect, you'll need to connect your new device to the internet before continuing.
Please see the following guides to connect your device:
- Private Wi-Fi Network Quickstart Guide
- Enterprise Wi-Fi Quickstart Guide
- Ethernet Network Quickstart Guide
4) Add The Device To Your Account
Now you are ready to add your new TraceableLIVE® device to your TraceableIVE® account and set its initial configuration such as the minimum and maximum ranges for alarms, etc.
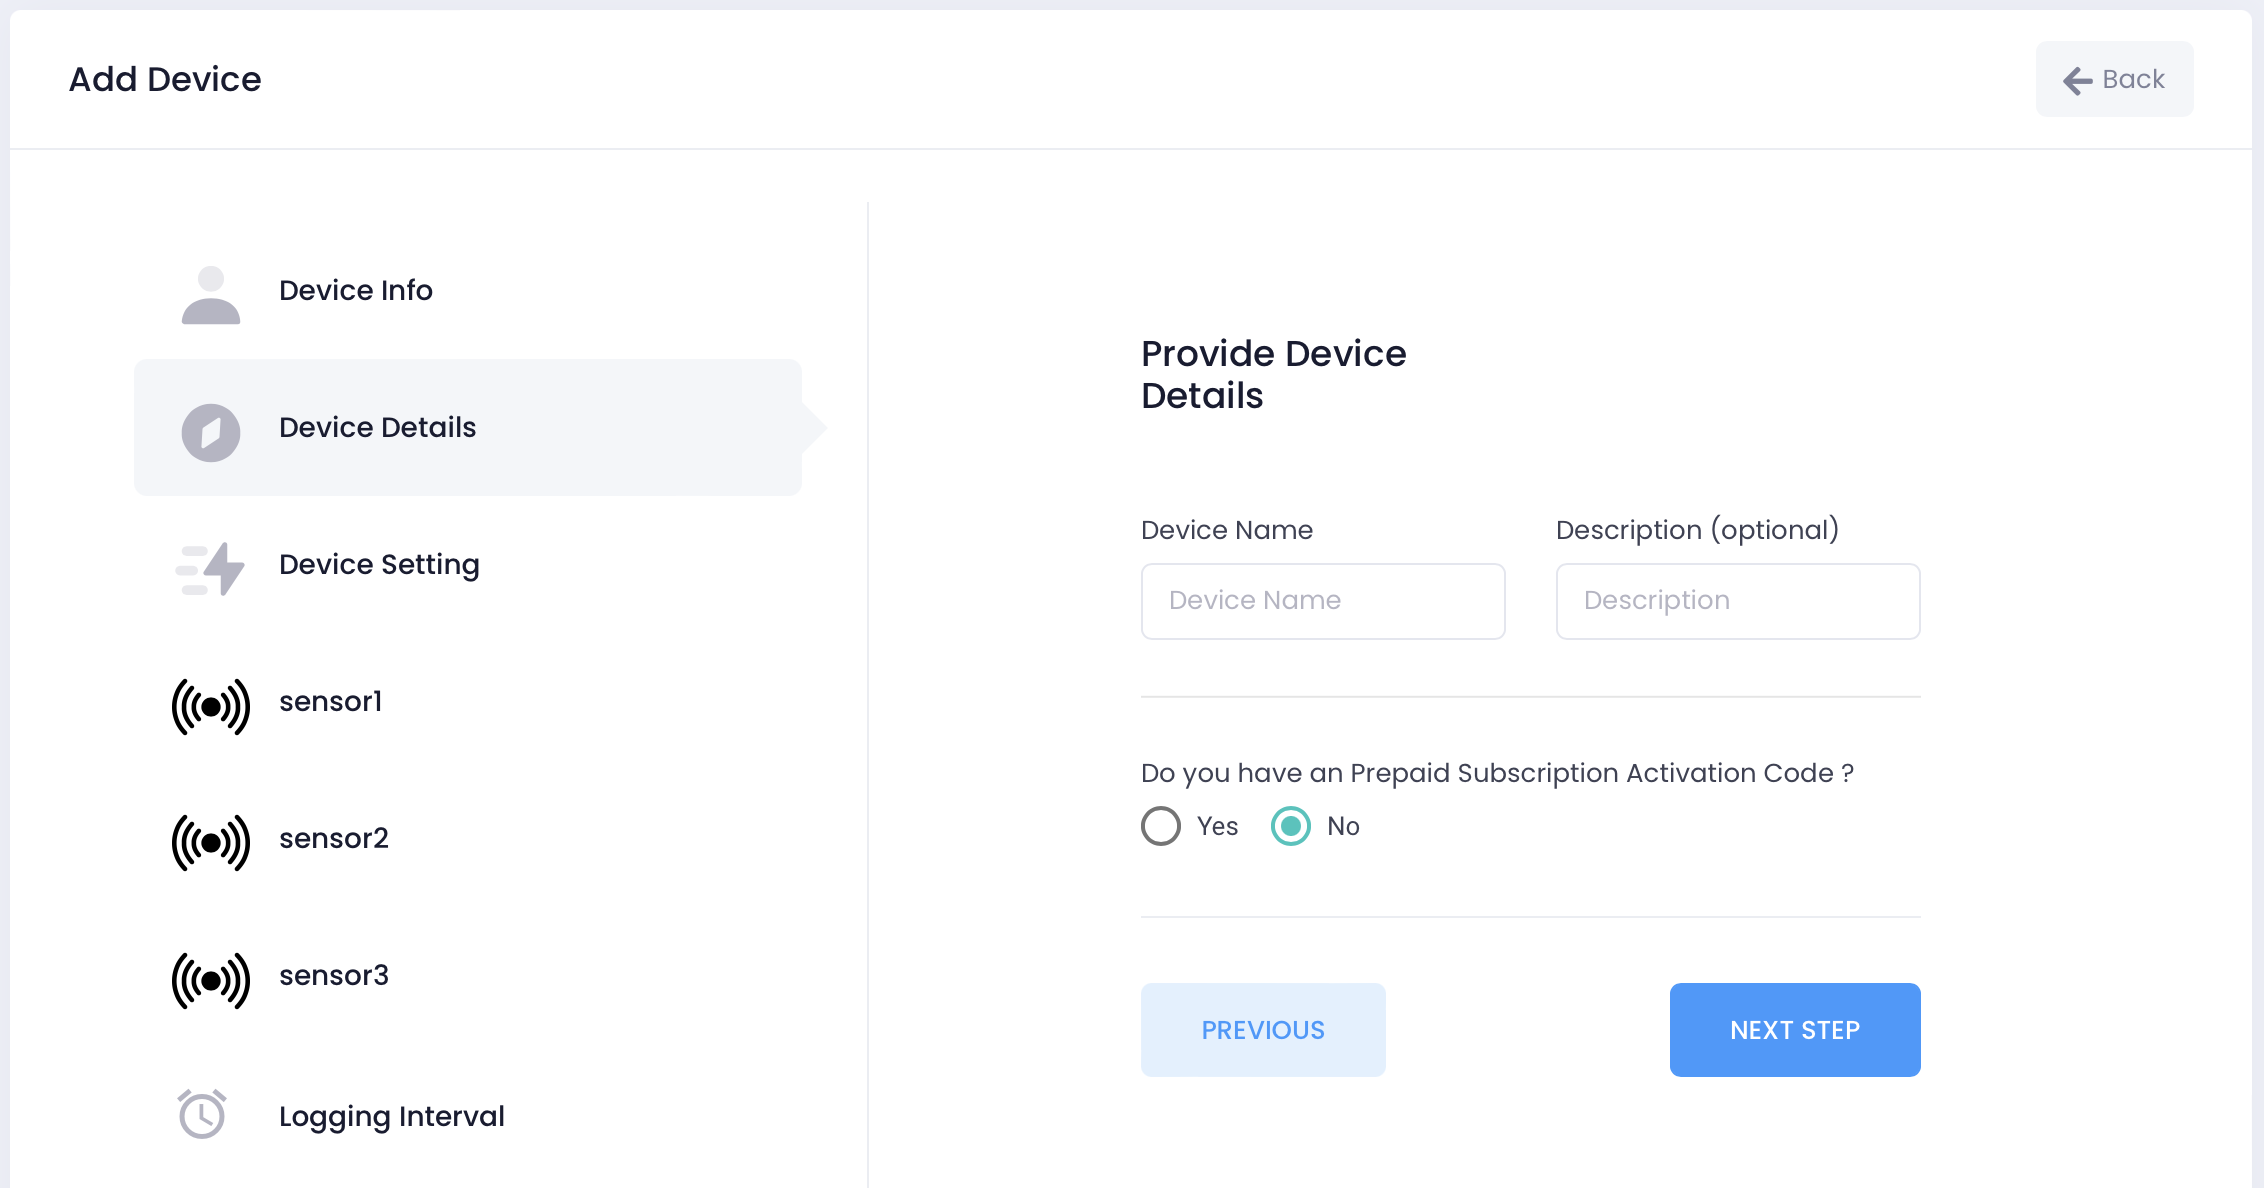
Please see our Adding a Device guide for details. If you are adding a coupon based device please see our Device Activation Codes guide.
5) Adding Users To The Device And Setting Notification Preferences
In the final step, you'll add the users that you want to be notified in the event of an excursion on the device and set their notification preferences.
If you don't add users to the device and set the notification preferences you will not be notified in the event on an excursion.
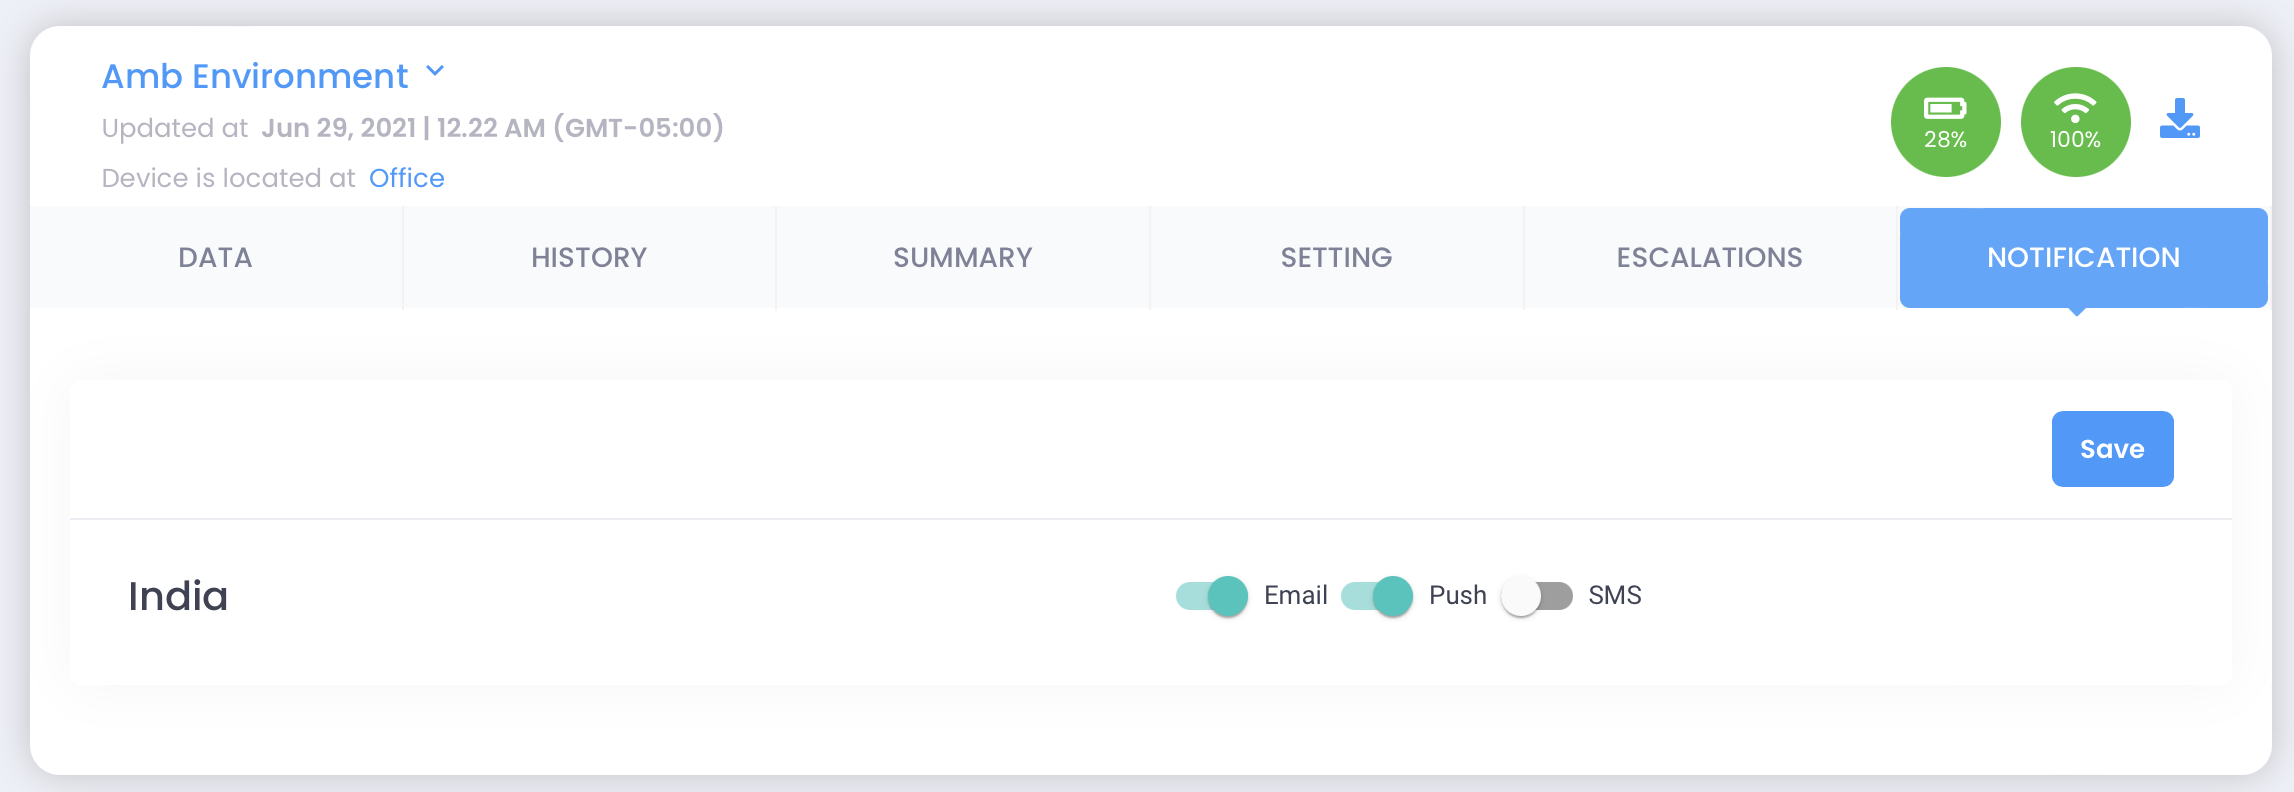
Additionally, you will need to select which users will receive Calibration Notifications when a device is about to require calibration:
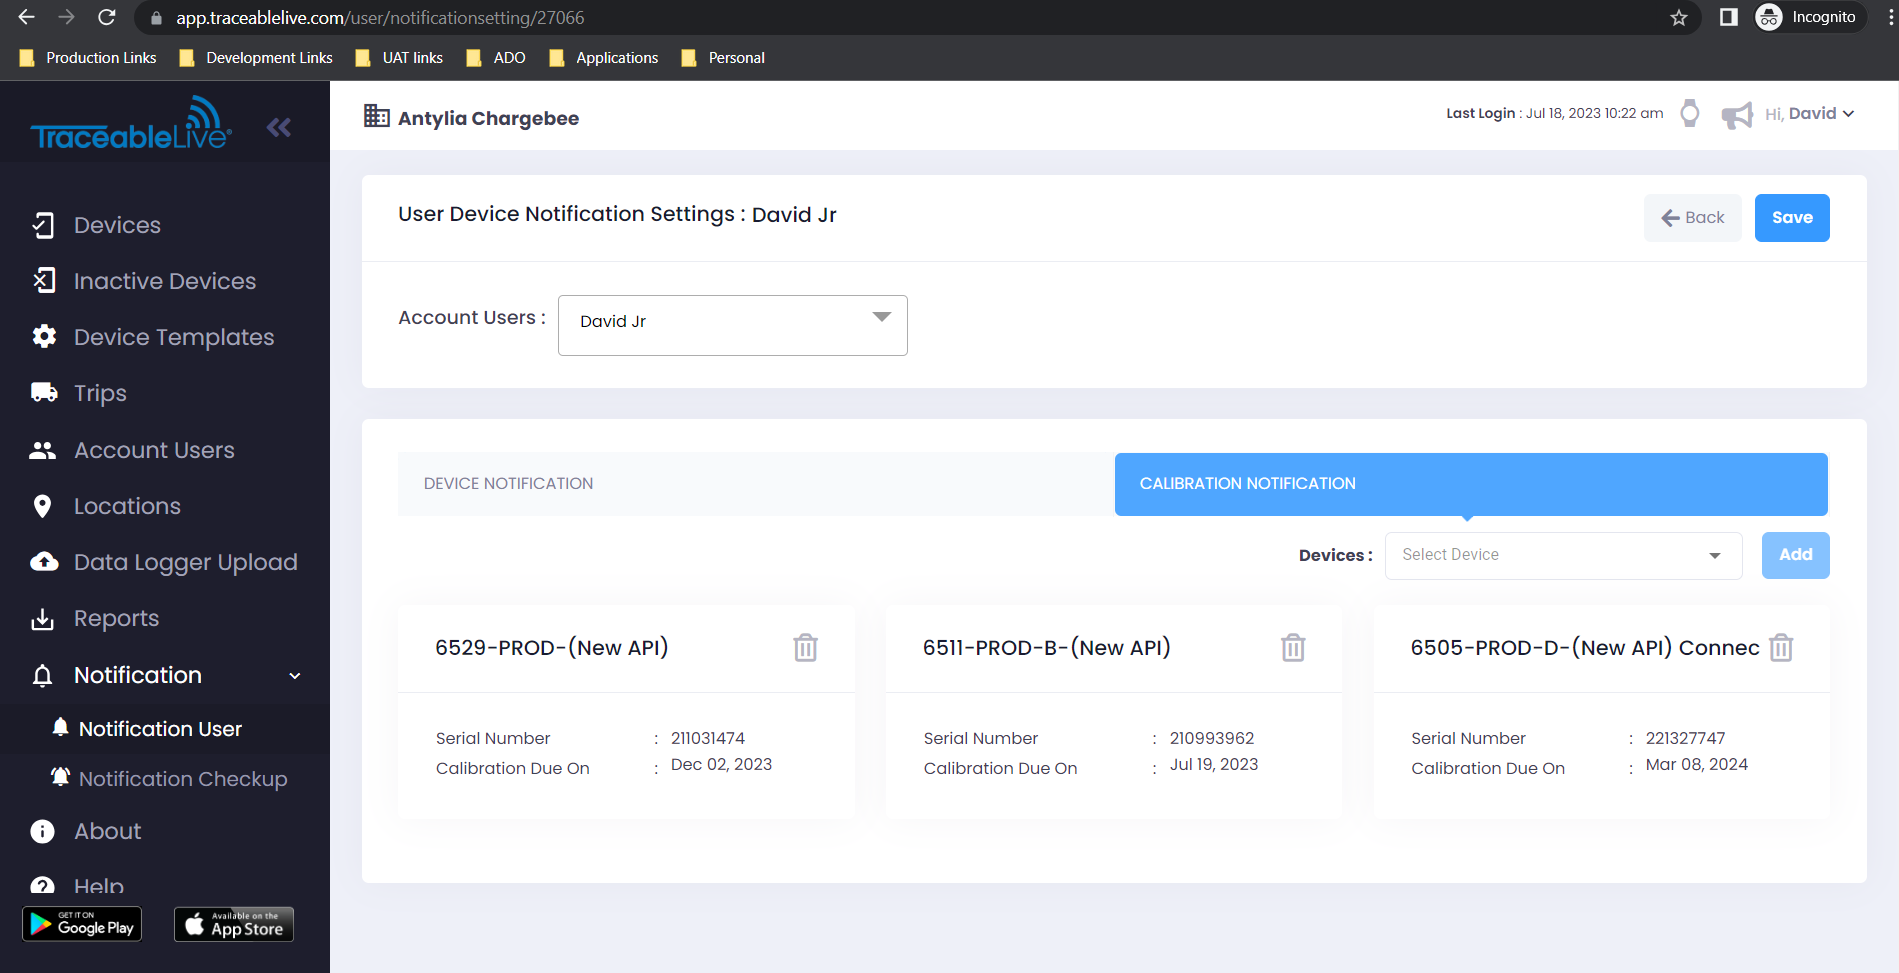
Please see the Notification section of our Device Settings Guide. Additionally, examine our Notification Preferences, Calibration Notification, Escalation Manager and Notification Checkup guides.