- 27 Sep 2022
- 3 Minutes to read
- Contributors

- Print
- DarkLight
- PDF
Escalation Manager
- Updated on 27 Sep 2022
- 3 Minutes to read
- Contributors

- Print
- DarkLight
- PDF
Escalation Manager
The Escalation Manager allows you to setup a chain of notifications to ensure that an alarm event on a TraceableLIVE® Cloud Connected Measurement Device is acknowledged and handled in a timely fashion.
After a given number of minutes that an alarm is not checked on a specific channel of a TraceableLIVE device, escalate a notification will be sent up a user-specified chain of command.

For example:
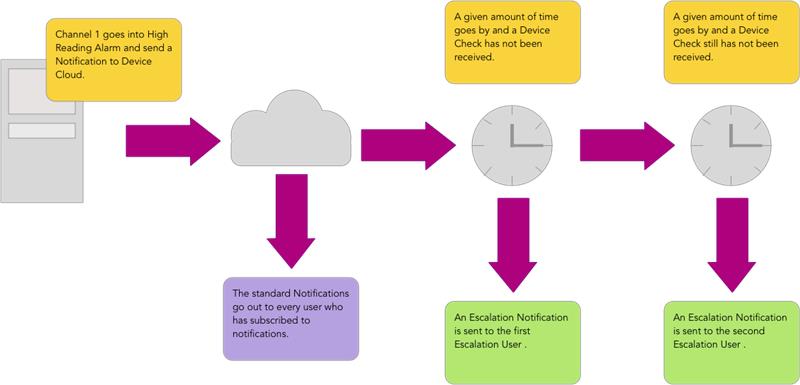
- A TraceableLIVE® Device has a high alarm and the normal Notification are sent, based on the preferences that each user has specified in Notification Settings in the same Location that the device is in.
- After a given amount of time (say 15 minutes) and a Device Check has not been received, a specified user will receive an Escalation Notification, informing them of the unhandled situation.
- If the Device Check is still not received, again after a given amount of time, the next specified user will receive a second Escalation Notification, informing them that both the initial Device Check and first Escalation Notification have gone unhandled.
Adding an Escalation
Escalations can only be created for devices that belong to one or more Locations. Device Locations are configured in the Settings tab of the Device View.
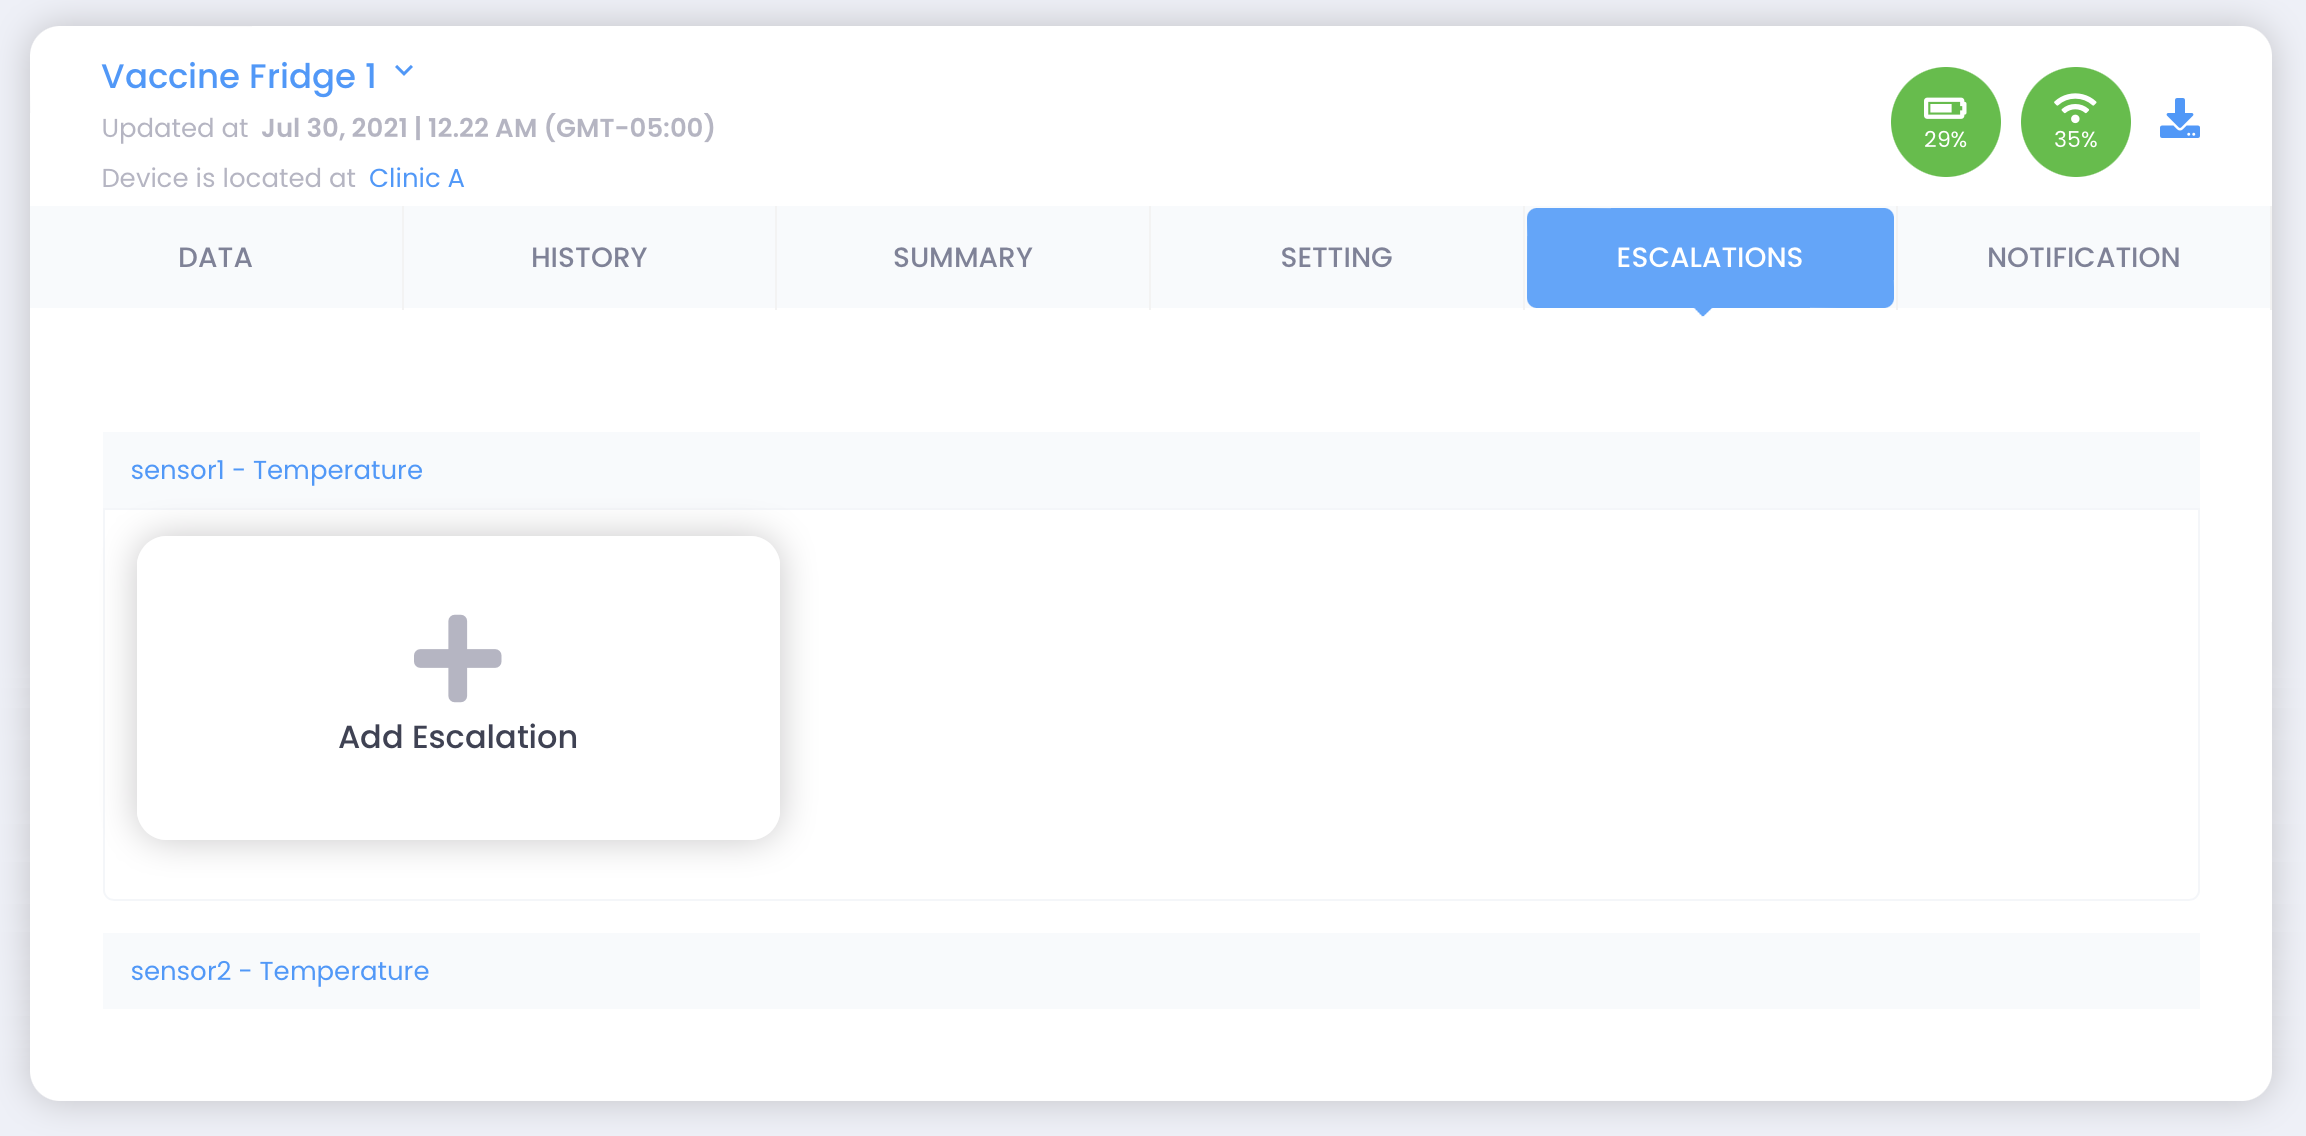
To setup or maintain the Escalation Chain for a given TraceableLIVE® Device, select the Device from the Device List. Next, select the Escalations tab and the following screen will be displayed:

To add a new Escalation, do the following:
Click the Plus Button in the Channel that you want to add an Escalation to.
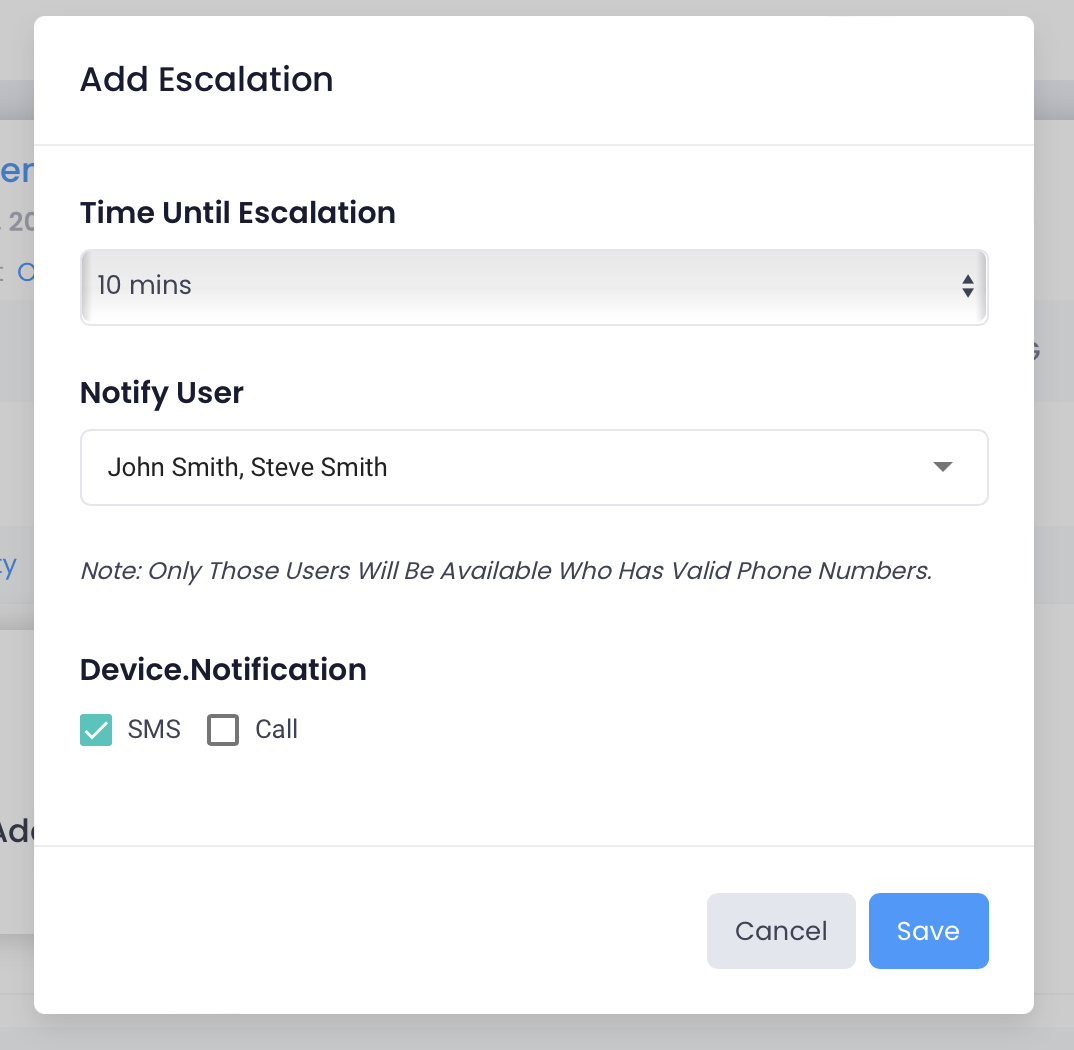
The Escalation Editor will be displayed:

Click on the Time Until Escalation dropdown and select the time before the Escalation is sent:
This will be the number of minutes that hav elapsed after an Alarm Notification has been delivered and the alarm has not be acknowledged.
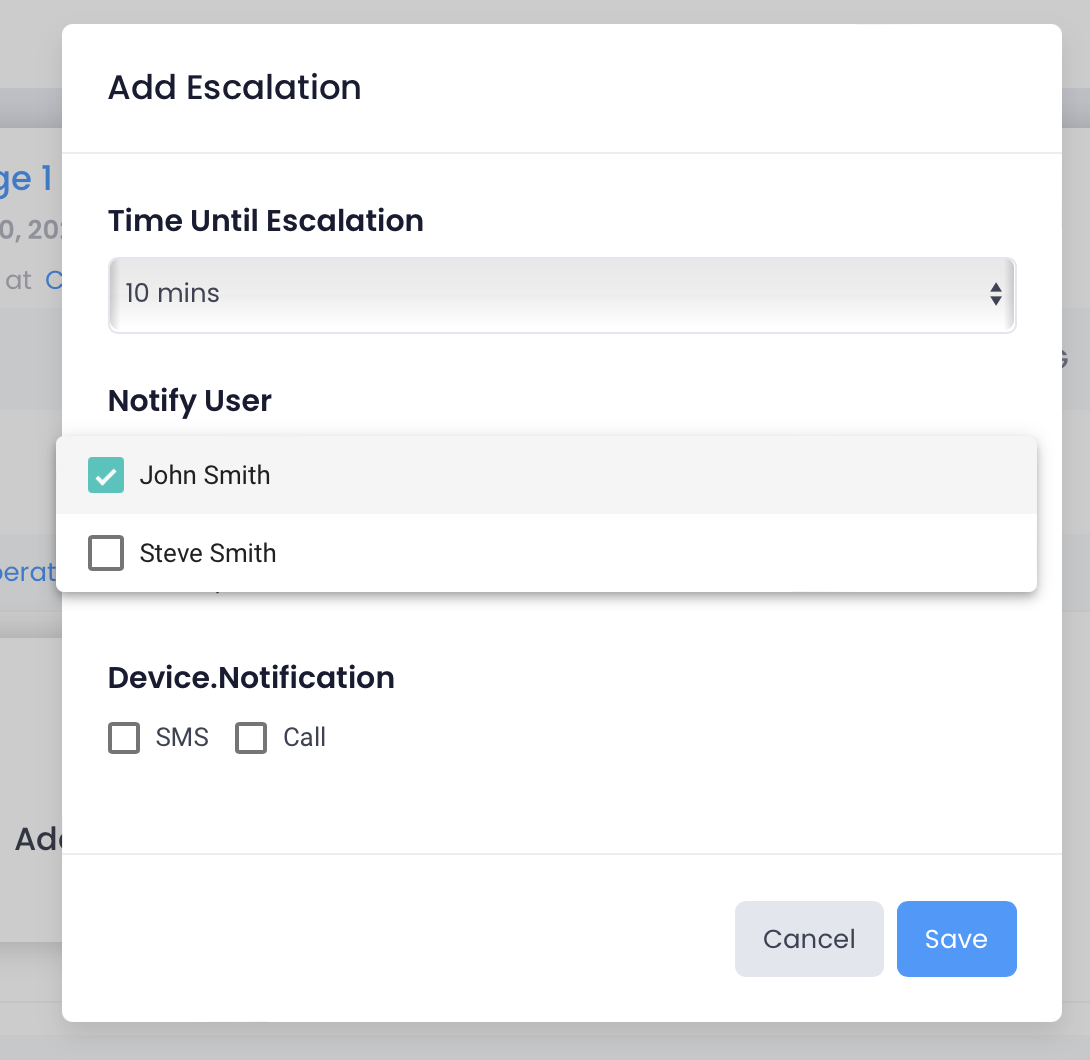
Click on the Notify Users dropdown and select the users that will receive the Escalation Notification:

Only users that has notifications enabled (via their [Notification Settings](https://traceablelive.document360.io/docs/notification-preferences)) for the same [Location](https://traceablelive.document360.io/docs/location-list-1) that the device is in will be available.

:::(Warning) (WARNING!)
When a user has been added to an **Escalation** Notification they will not be able to change their **Locations**, **Phone Number** or **Notification Settings** until they have been removed from the Escalation.
:::
- Click the Add button to save the Escalation and add it to the given Channel:

- Repeat the process to add additional Escalations.
Voice Call Based Escalations
Voice Call based Notifications require a Preimum Account subscription to be activated. If you are on a Free or Standard Tier, you will need to upgrade your account to Premium to use this feature.
Users on the Premium Account Tier now have the option of having an Escalation place a Voice Call to a given set of phone numbers. When using this feature, the individual phone numbers will receive a voice call that will be read by a text-to-speech app giving the details of the device excursion.
To activate this feature, before finalizing an Escalation check the Call checkbox.
Click the Save button to finalize the Escalation.
Editing an Escalation
To edit an exiting Escalation, return to the Escalations tab of the device to modify. Click on the card to edit and the Escalation Editor will be displayed:

Click on the Update button to save the changes to the Escalation.
Removing an Escalation
To delete an exiting Escalation, return to the Escalations tab of the device to modify.
Click on the Trashcan Icon in the upper right-hand corner of the Escalation Card to remove.
Only the last Escalation in each Channel can be removed.


