Device Settings
The Settings View allows you to enter and maintain the settings for your TraceableLIVE® Datalogger.
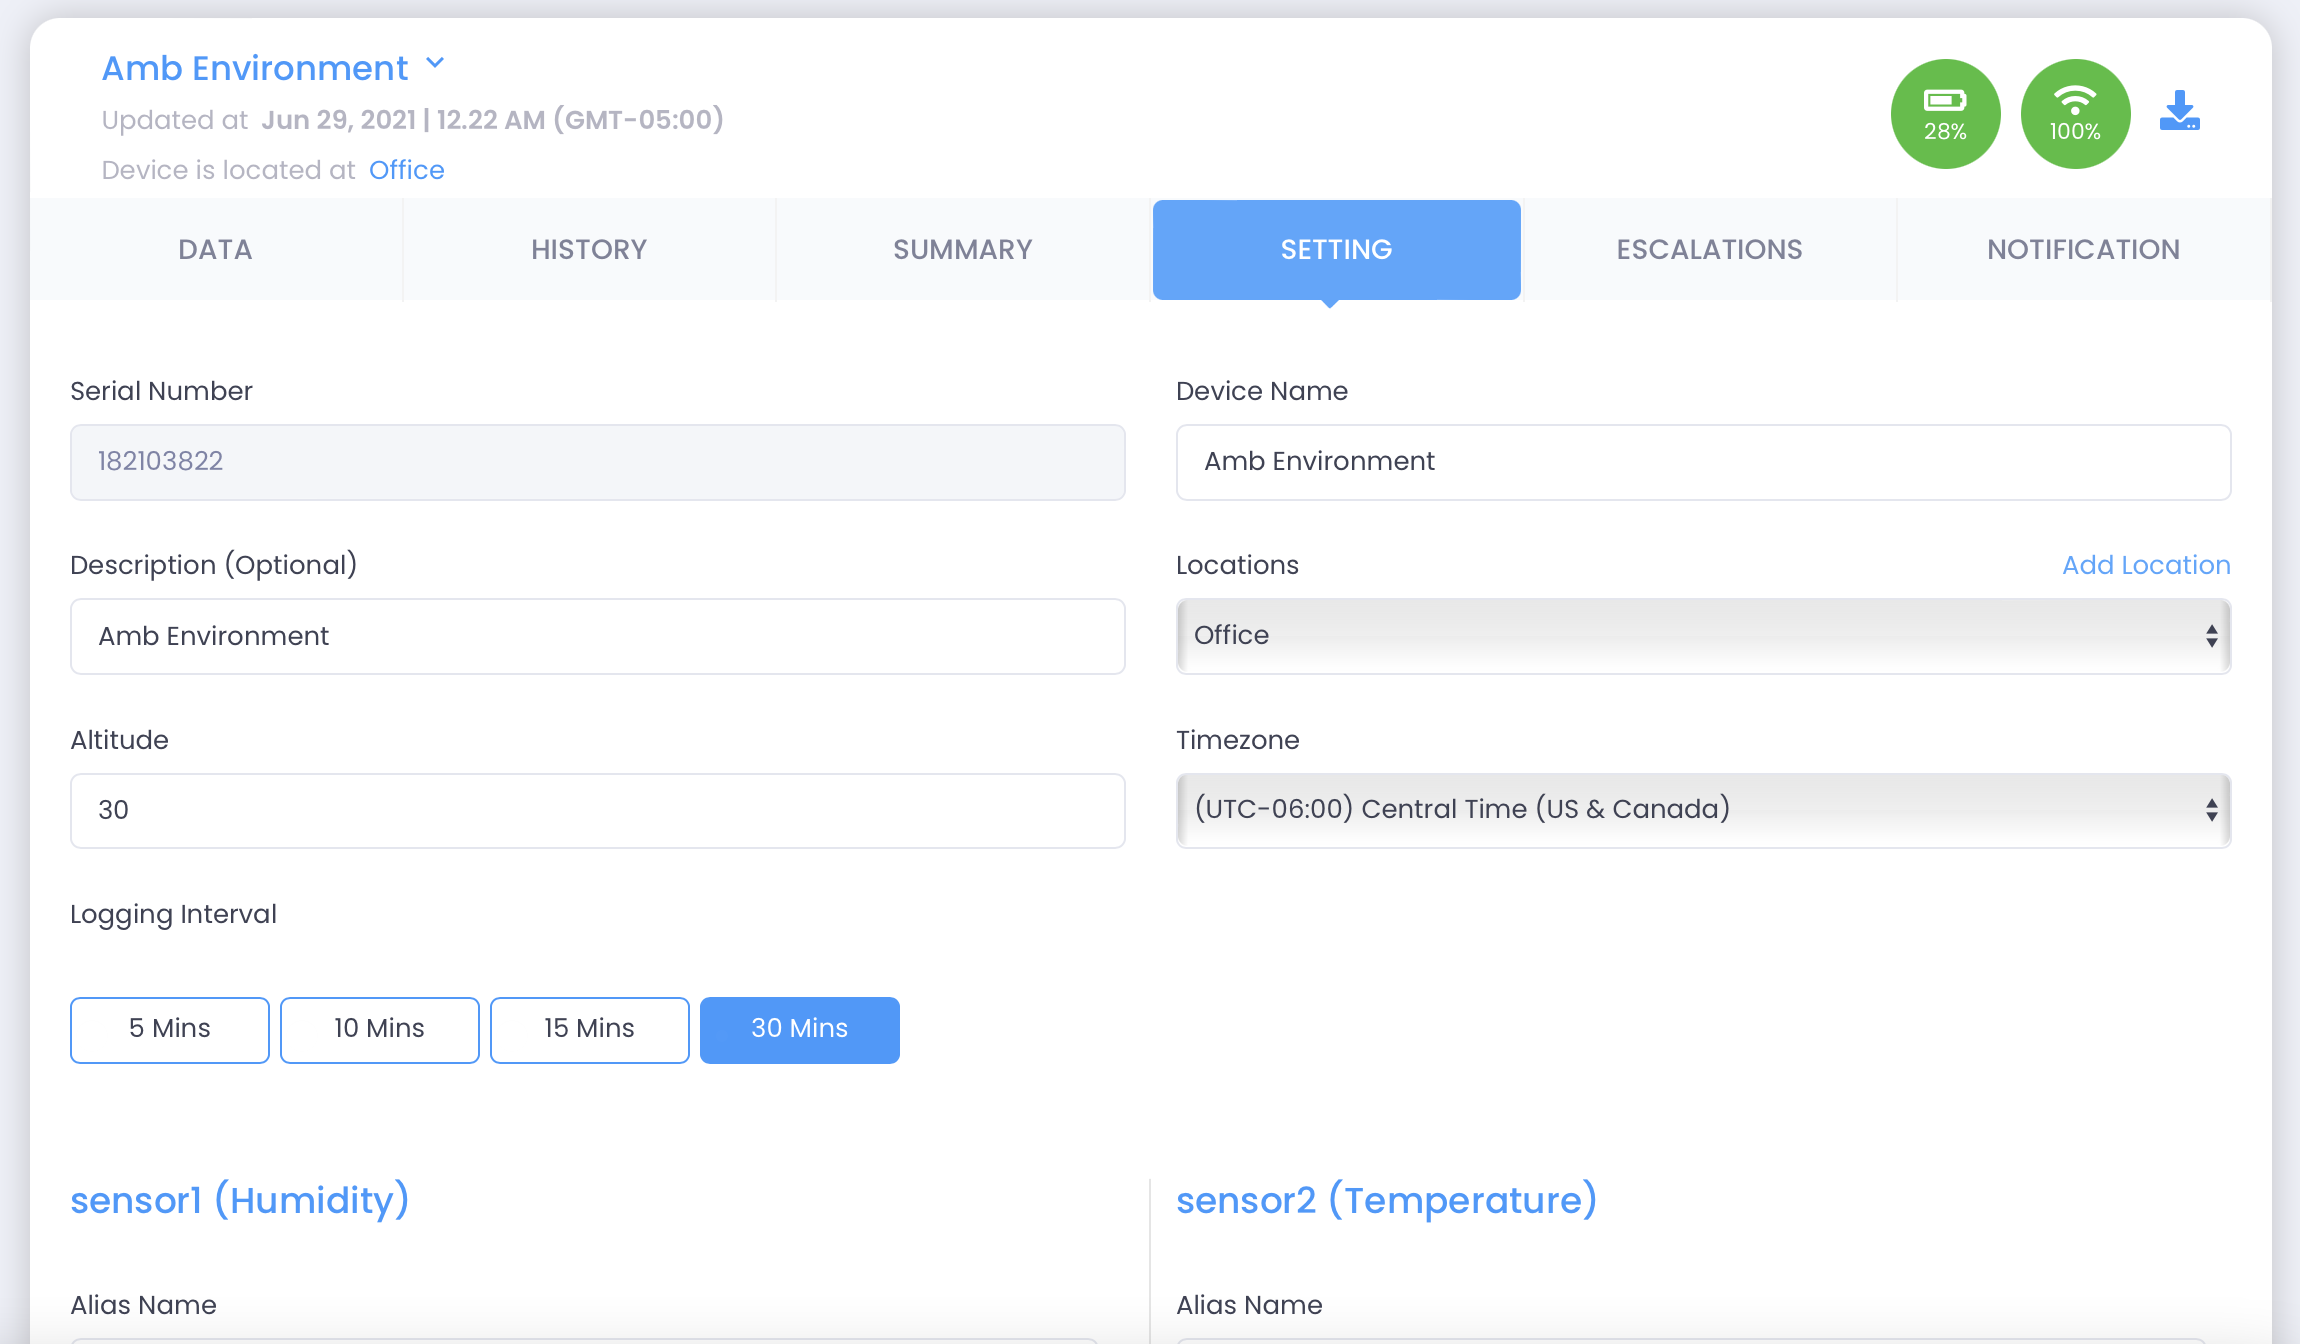
Changing Device Settings
From here you can modify the following device features:
- Serial No - Displays the device unique serial number.
- Device Name - Enter a unique name to identify the device.
- Description - Enter an optional description for the device.
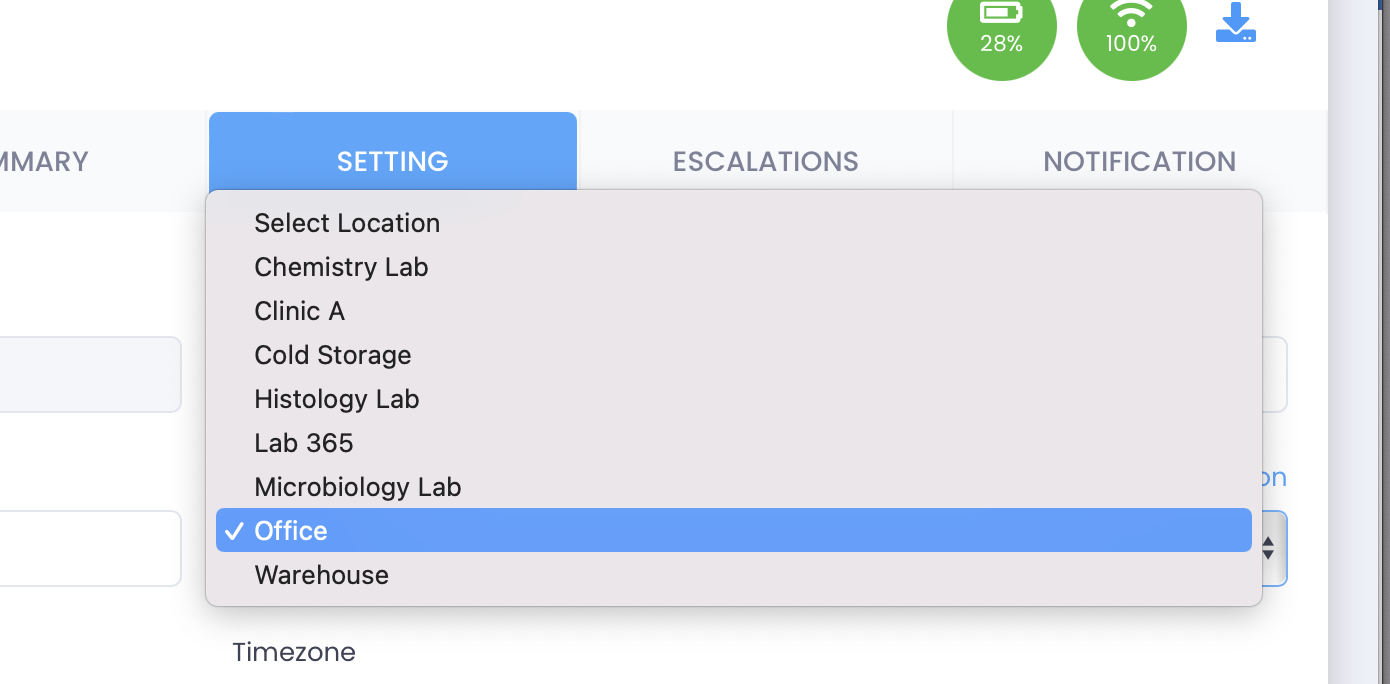
- Location - Select the Location of the device from the Locations Turndown. See Location for adding and maintaining Locations.
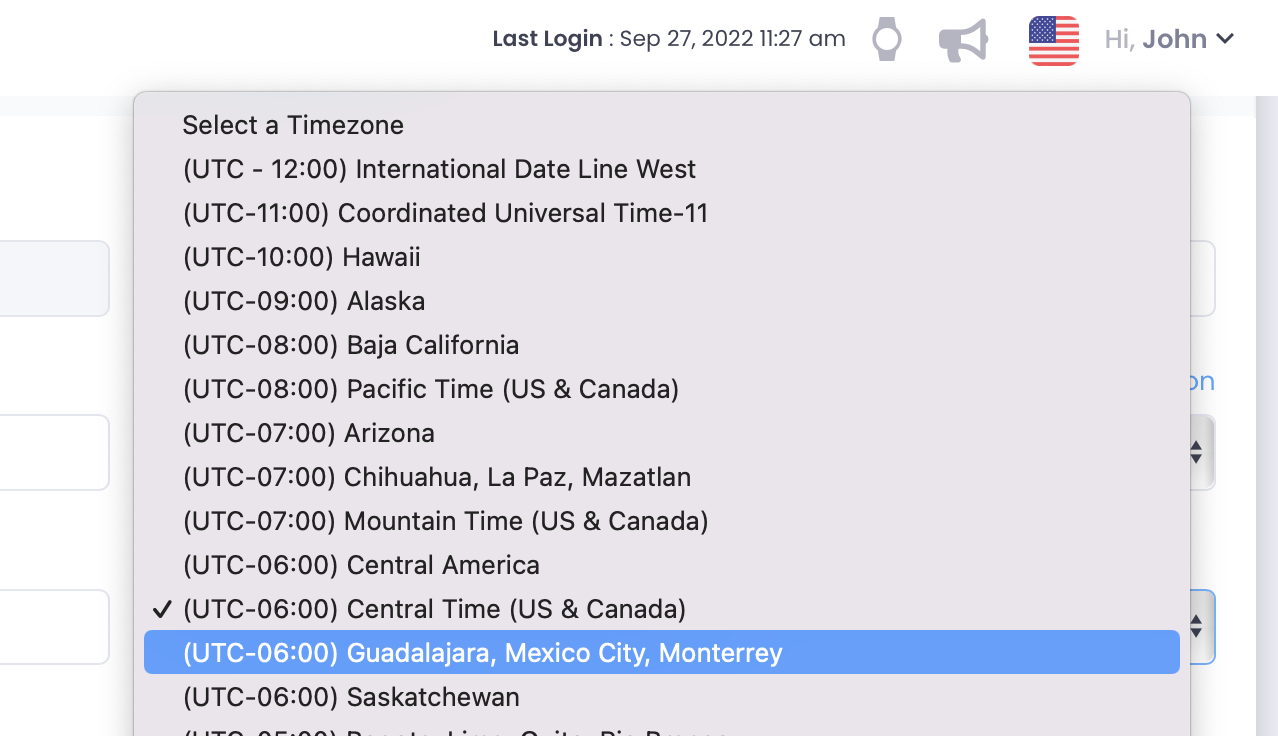
- Time Zone - Use this dropdown the select the timezone the device is in.
- Channel Alias - Give a descriptive name to each of the device's channels.
- Low Alarms - Enter the low alarm value. If the reading drops below this value you'll get a notification.
- Hig Alarms - Enter the high alarm value. If the reading goes above this value you'll get a notification.
- Logging Interval - Use this dropdown to set how often the device posts it readings to the cloud.
Smaller interval times can impact the devices battery life.
When you are finished making changes, tap the Update button.
Confirming Changes to Alarm Thresholds
If any Low Alarm or High Alarm value is modified, a confirmation window appears.
.png)
This window will display:
- The Channel Name
- The Old Min (Low Alarm) value
- The New Min value
- The Old Max (High Alarm) value
- The New Max value
To proceed, do the following:
- Review the old and new values shown for accuracy.
- Enter a mandatory Reason for Change describing why the alarm range is being updated.
- Select Save Changes to confirm and apply the new alarm settings.
- Select Cancel if you do not want to proceed with the modification.
Viewing Alarm Change History
.png)
You may view the historical changes made to any channel’s Low or High Alarm settings.
To do this:
- Select View Alarm History.
.png)
- A table will appear showing all previously modified alarm ranges for each channel, including:
- Channel Name
- Old Min Alarm
- New Min Alarm
- Old Max Alarm
- New Max Alarm
- Unit of Measure
- Modified By / Modified At
- Reason for Change
To view the full reason text, select the corresponding view icon in the Reason column. A separate pop-up will display the complete entered reason.
.png)
Select Close to return to the history list or to exit the history view.
Notifications
You can adjust your notification preferences from the Device Settings view. Select the Users tab and you’ll see the list of users associated with the device.
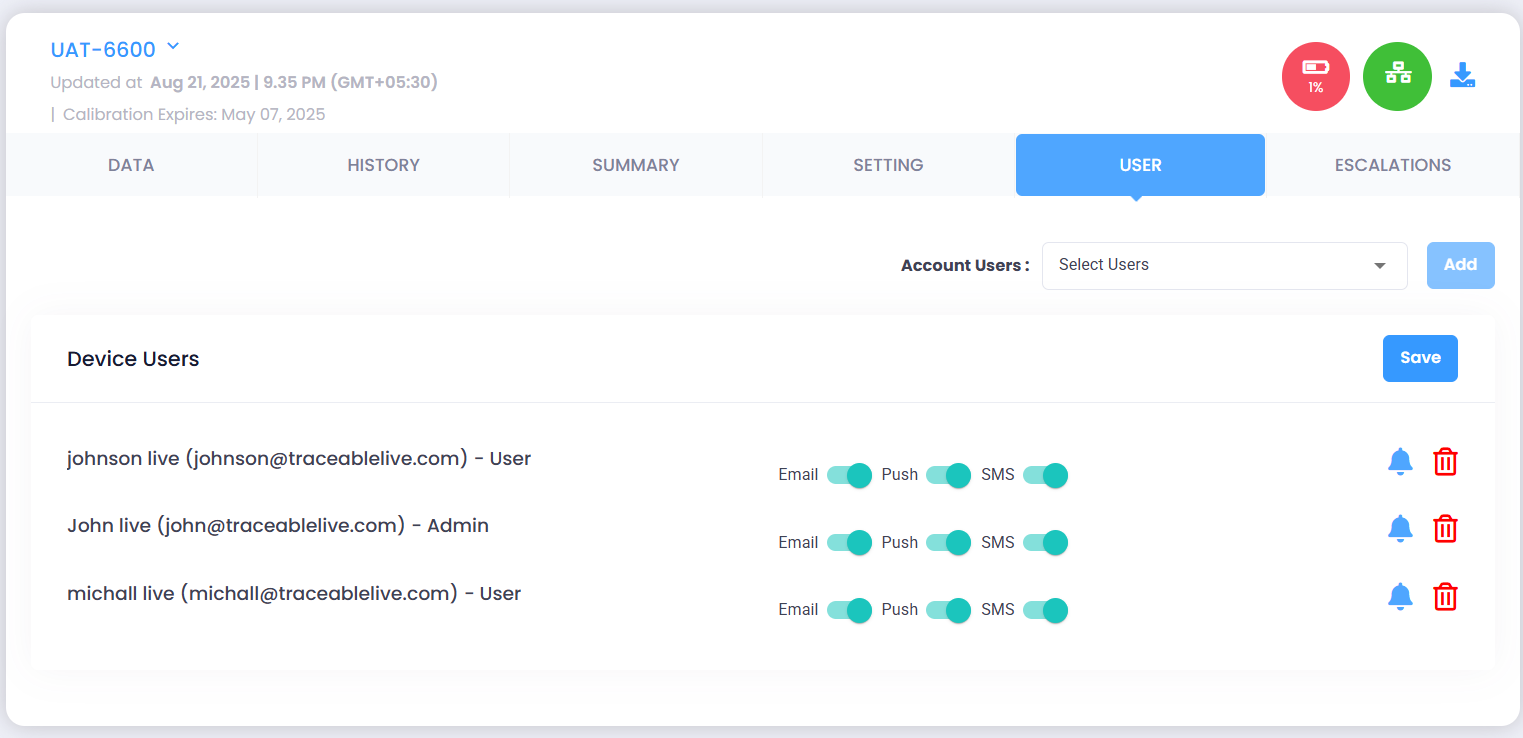
As an Admin, you can add users (either Admin or Normal User) so they can also receive notifications from the device.
To add a user:
- Select a user from the Account Users dropdown list.
- Click the Add button to include them in the device.
- Select the notification channels you’d like to use (Email / Push / SMS).
- Click Save to confirm the changes.
Any alert or alarm notification from the device will only be sent to users listed under the Users tab.
Notification Preferences
Click the notification bell icon next to a user to open the Notification Preferences window. From here, you can select the events you’d like to receive alerts for, such as:
- Alarm Ack – When an alarm is acknowledged
- Max Alarm Out / Min Alarm Out – When readings go outside the defined limits.
- Max Alarm In / Min Alarm In – When readings return within the defined limits.
- Clear Min/Max / Device Checked – When alarms are cleared or the device is checked.
- Low Battery – When the device battery is running low.
- Lost Connectivity – When the device loses network connection.
- Connectivity Restored – When the device reconnects.
- Setting Changed – When device settings are updated.
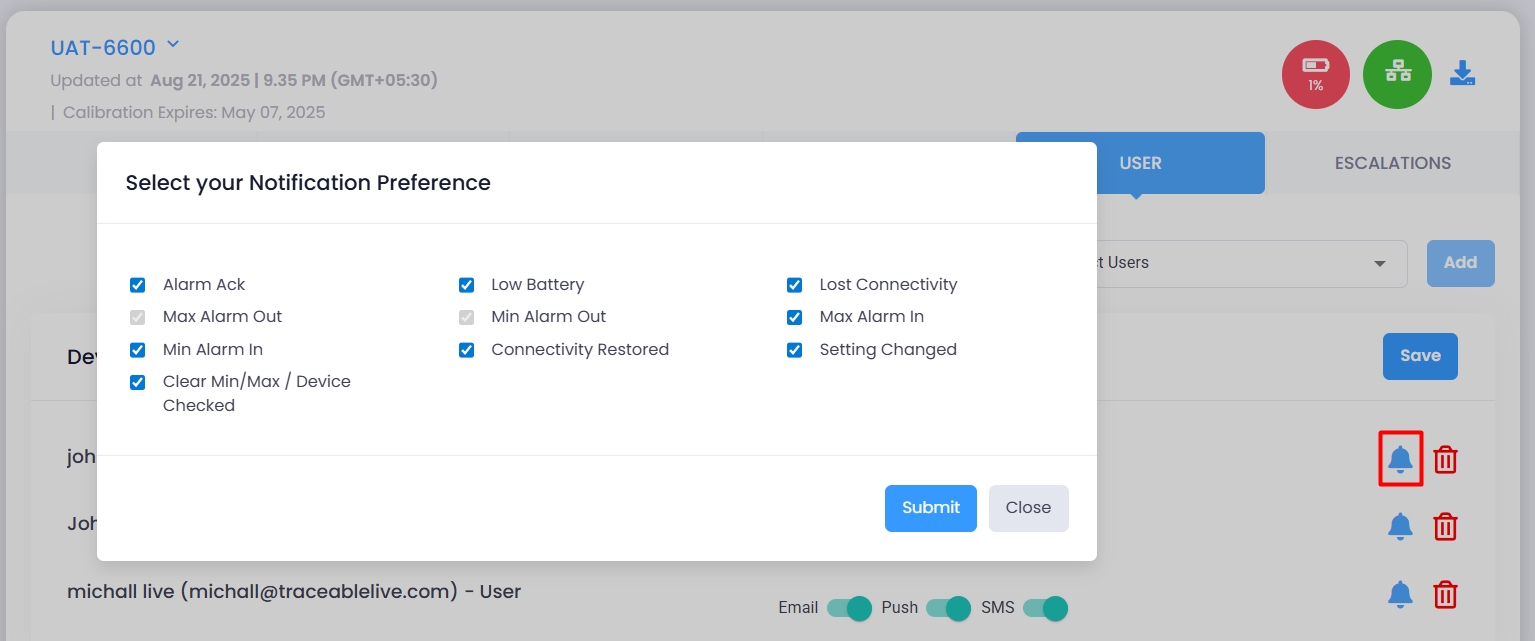
The Max Alarm Out and Min Alarm Out notifications cannot be disabled. These are critical alarms required for compliance and monitoring purposes.
To update your preferences:
- Click the bell icon next to the user.
- In the Notification Preferences window, check the events you want to be notified about, or uncheck the ones you don’t.
- Click Submit to confirm your choices.
- Click Save to apply the changes.
Only the events you select will generate notifications, and they will be delivered through the channels you enable (Email, Push, SMS).
Remove a User:
- To remove a user from the notification list, click the Trash Bin icon next to the user's name.