Getting to Know your 7600 Data Logger
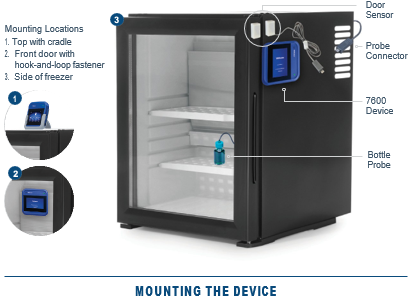
When routing your probe and sensor wires, you need to ensure that they do not interfere with the opening/closing of the refrigerator’s/freezer’s door. Additionally, you need to secure the wires so that the probe, sensor, or the 7600 Device will not be pulled out of position when opening/closing the door.
1. Plug in Your 7600 Data Logger
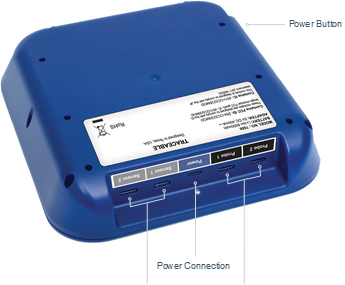
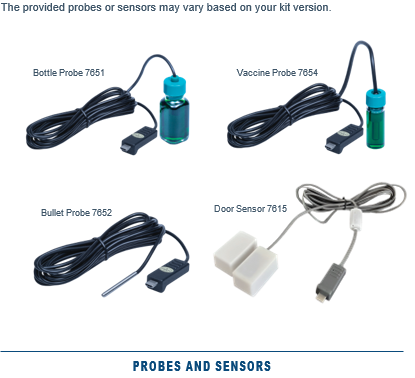
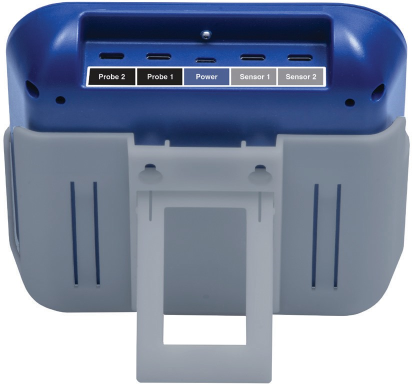
After you’ve routed your cables, plug in the sensors, probes, and power connector. Push the power button and the display will turn on. The provided probes or sensors may vary based on your kit version.
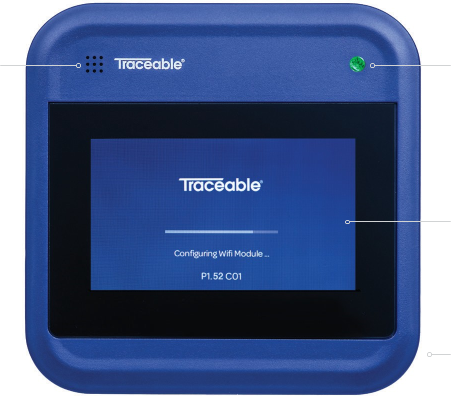
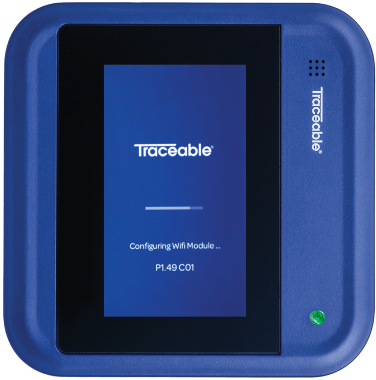
2. Setting Up Your 7600 Data Logger
Follow the onscreen instructions to set up your 7600 Data Logger. Before setting up your device, have your Wi-Fi network name and password ready. During the setup process, you will connect your device to the internet so that the device can communicate with the TraceableLIVE® service and provide remote monitoring and configuration of your device.
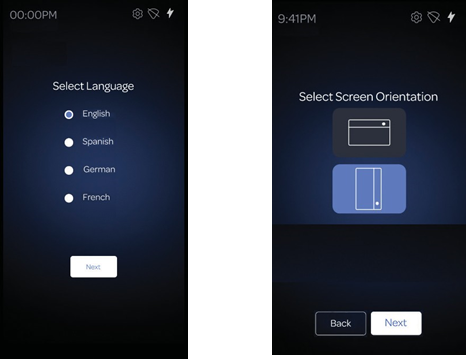
3. Select Your Language and Device Orientation
First, select the language that you want your 7600 Data Logger to display in. Second, select the orientation (either landscape or portrait) that you are going to mount your 7600 Device.
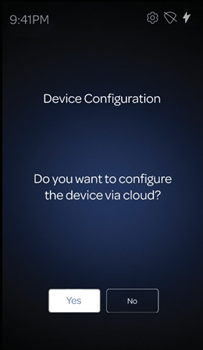
4. Configuring to the Cloud
Click on the Yes button to configure the device to the cloud.
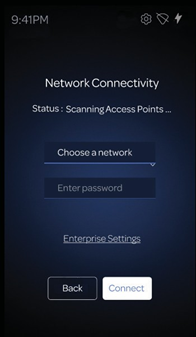
5. Connecting to the Network
For your 7600 Data Logger to provide remote monitoring and configuration, along with sending alert notifications (in the event of an excursion), you will need to connect your device to your Wi-Fi network. From the dropdown list, select your Wi-Fi network name and enter your network password. If you have successfully connected your device to your Wi-Fi network, the network name, status, and signal strength will be displayed.
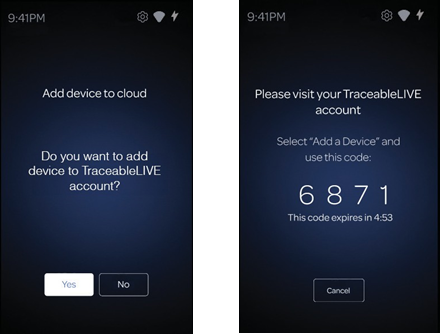
6. Connecting Your 7600 Device to TraceableLIVE®
Your 7600 Data Logger will ask you to connect it to your TraceableLIVE® Account, answer Yes and the device will display a PIN number. Log in to your TraceableLIVE® Account on the TraceableLIVE® web app and add a new device with the PIN number given above. You have five minutes to complete the transaction or the
PIN number will become invalid, at which time you’ll have the option to extend the transaction time and will be provided a new PIN.
7. Adding Your Device
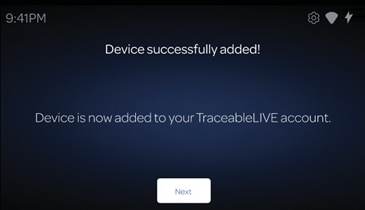
First, navigate to web Traceable LIVE Account and click on New Devices Device 7600. Second, enter the PIN number and click the Submit button. On the physical device, you can view the “Device successfully added!” message.
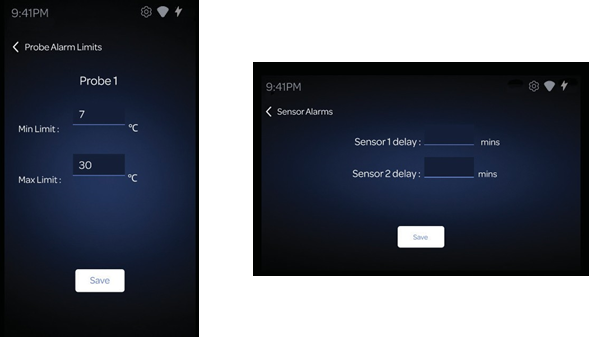
8. Configure Your Probes and Sensors
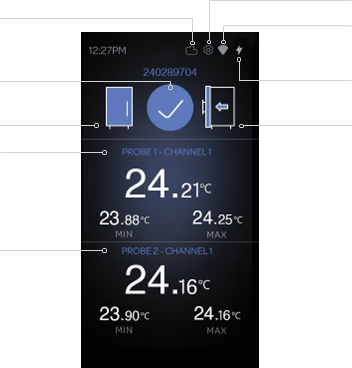
9. Explore Your 7600 Data Logger
With your 7600 Device configured, here are the main features of the device that you will more than likely interact with on a daily basis. Typically, the 7600 Data Logger will display the home screen as it appears below. From here you can see the overall status of the device and the attached probes. Additionally, you
can change the device’s settings by tapping the gear icon at the top of the screen.