- Print
- DarkLight
- PDF
Device Configuration
The Device Configuration option consists of menus that allow users to configure the device according to their preferences, including options for Network Configuration, Probe Configuration, Security, Set Date/Time and Software Update.
When saving any device configuration, the changes will only be saved on the device. To sync these changes with the cloud, tap on the Home icon displayed at the top middle of the screen. Ensure that the device is connected to both Wi-Fi and Power to view all the updated settings on your Traceable LIVE® account.
To access the Device Configuration option navigate to the settings menu by tap on the Settings Icon from the home screen.
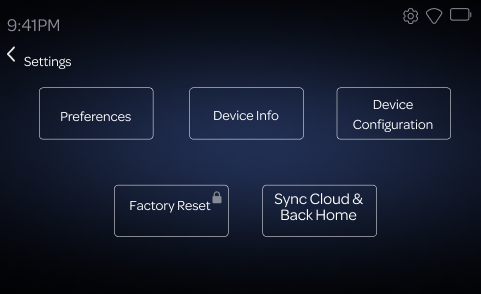
Network Configuration
On the Device Configuration Menu, tap the Network Configuration Button to view the network you are current connected to.
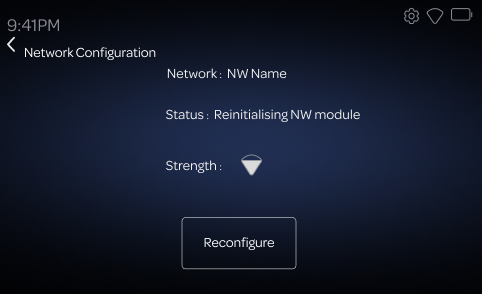
You'll be able to see the following:
• Network -The ID of the network that you are connected to.
• Status - The Wi-Fi connection status of the device.
• Strength The Wi-Fi signal strength.
Tap the Reconfigure Button to connect your device to a different Wi-Fi Network. Next, for a basic setup, select/enter your Network Name and Password
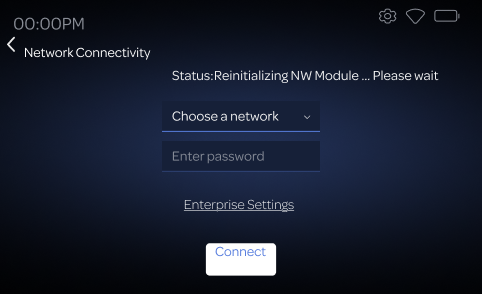
If you are connecting to a more complex Enterprise Network, tap the Enterprise Settings link and follow the onscreen instructions to connect to your network:
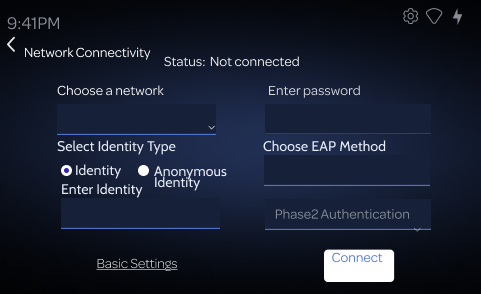
Tap the Connect Button to finish the process and connect to your network
Probe Configuration
The Probe Configuration section allows users to adjust settings for connected Probes.
On the Device Configuration Menu, tap the Probe Configuration Button to view options Probe 1, Probe 2 & Alarm Repost.
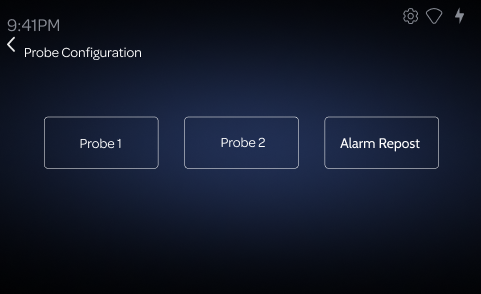
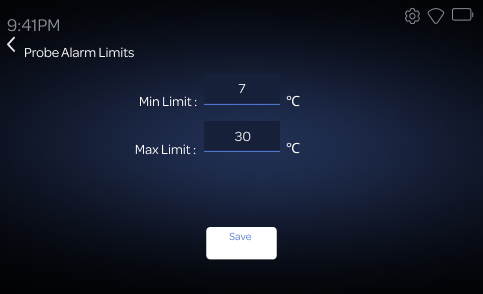
Probe 1 & Probe 2
The user will have the option to configure the minimum and maximum temperature limits for each probe. If the temperature goes outside the defined range, the device will trigger an alarm notification, alerting the user about the temperature being out of the set limit.
Temperature limits can be set between -50°C to 60°C.
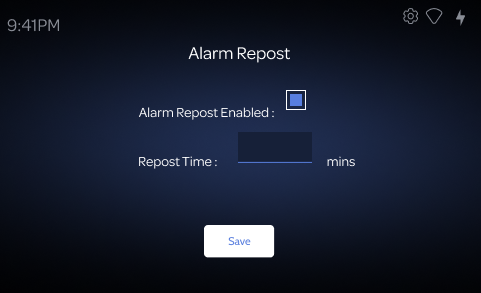
Alarm Repost
If enabled, the device will resend an Excursion after the given Repost Time if the temperature is still out of set range.
Security
The Security settings allow users to manage PIN-enabled protections for accessing the device’s functions. This includes enabling a PIN for general access, alarms, and notifications to ensure that only authorized users can modify settings or dismiss alerts.
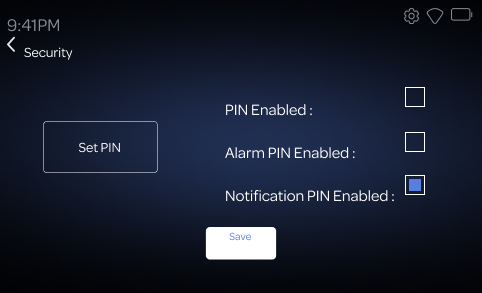
The Security settings screen includes the following options:
- Set PIN: Allows the user to change the PIN.
The default PIN Number is 0000.
- PIN Enabled: Enables a PIN for updating device settings options.
- Alarm PIN Enabled: Adds a PIN requirement before alarms can be disabled.
- Notification PIN Enabled: Adds a PIN requirement to dismiss notifications.
Set Date/Time
The Date and Time settings allow users to manually set the date and time on their device. This includes selecting the clock format (12-hour or 24-hour).
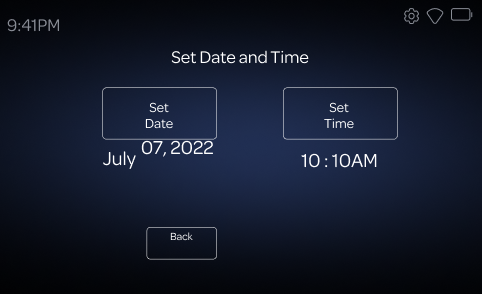
The Set Date and Time screen provides the following features:
- Set Date: Allows users to manually adjust the date by selecting the day, month, and year.
- Set Time: Allows users to manually adjust the time by selecting the hour and minutes. Users can also toggle between 12-hour and 24-hour clock formats.
Software Update
Refer document for Software Update
Update Software


